“Free Seashell Applique and Embroidery Patterns: Create Beautiful Coastal Designs”
Free Seashell Applique and Embroidery Patterns
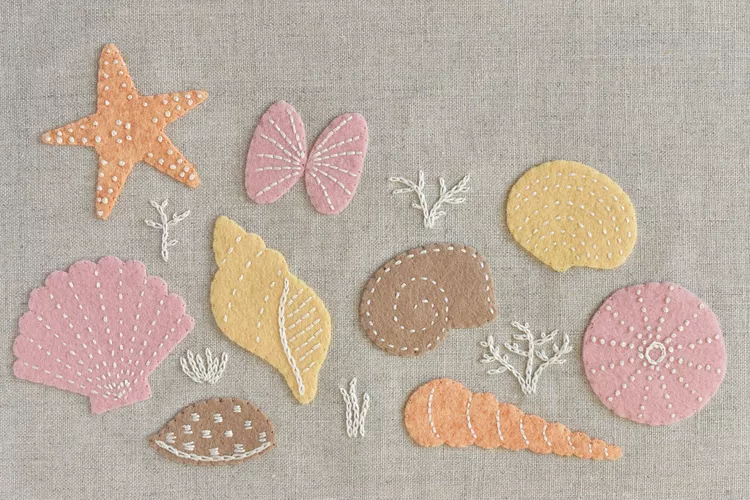
This collection of stitched seashells lets you enjoy the fun of the shore no matter where you are. Use the patterns as a group or as single shells, and choose if you want to fill in the areas with felt appliqué like the sample or stitch them with traditional embroidery in one or more colors. There are lots of ways to use the finished designs, from home decor to fashion accessories.
Pattern
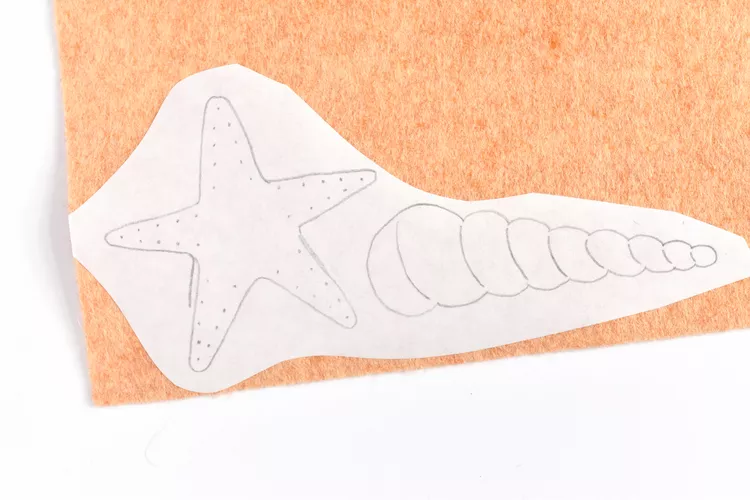
You can stitch the downloadable seashell embroidery pattern just as you see it, or you can separate the shells to use one or a few rearranged. You can also embroider the shells with your favorite stitches or use appliqué to make them bold and colorful. On the pattern, the thick lines are for cutting the appliqué pieces and the thin lines are for embroidery. However, if you only want to embroider, you should stitch all the lines.
What You’ll Need
Equipment / Tools
Pencil Scissors Iron Washable glue stick Embroidery hoop Needle Materials Freezer paper Wool or wool blend felt Linen or other base fabric Embroidery floss
Instructions
Step 1
Prepare Your Pattern
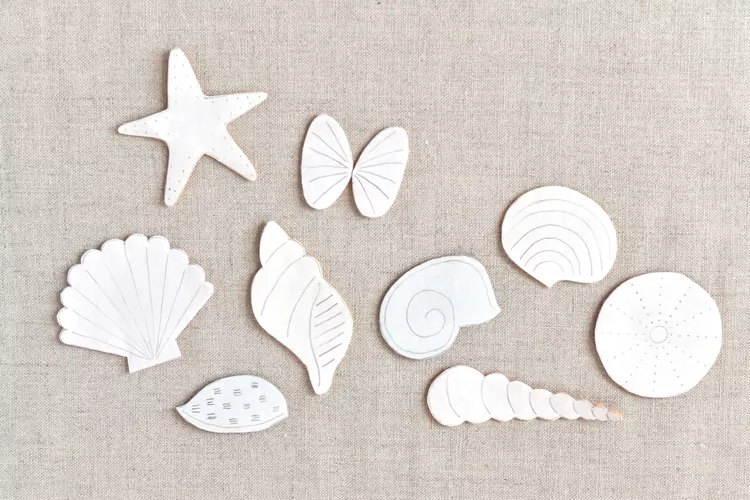
To cut out the shells and transfer the pattern, use a variation of the tracing paper method. Print out the shell pattern at whatever size you like. Trace the pieces you want onto the paper side of freezer paper. If you’re making felt shells in several colors, group the traced pieces by the felt color you want to use. Cut the pattern pieces apart and iron them, slick side down, to the felt.
Step 2
Arrange the Seashells
Cut out the felt shapes and leave the paper attached. Place your base fabric in an embroidery hoop and arrange the shells. If you want to add embroidered coral and seaweed, you can trace those patterns on freezer paper and arrange them too, then iron them to the fabric. Use a bit of glue stick to hold the shell pieces in place while you stitch.
Step 3
Embroider the Shells
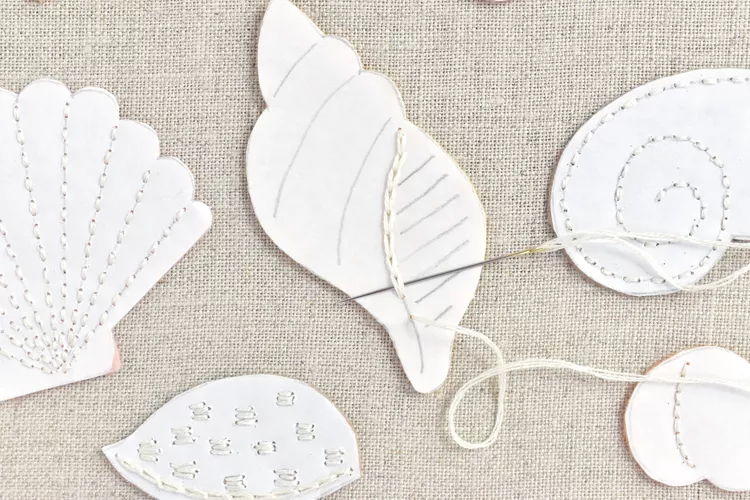
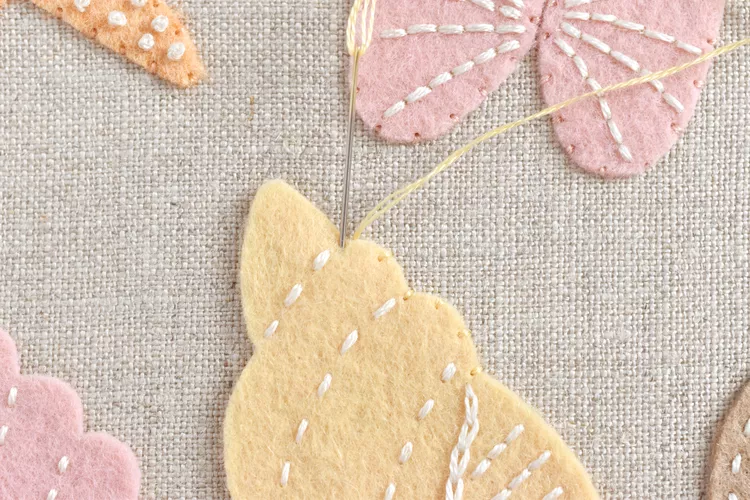
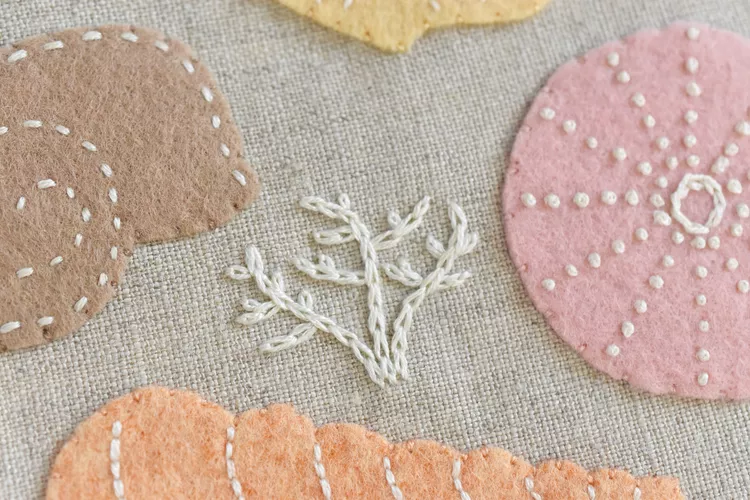
Use three strands of embroidery floss to stitch the details on the shells. Stitch through the felt and the paper at the same time. Some details show obvious choices for stitches: running stitch, french knots, and straight stitches. For others, you can use your favorites, such as chain stitch, back stitch, or stem stitch.
Step 4
Remove the Pattern Paper
When the embroidery is finished, carefully tear away the paper. Don’t pull too hard or you’ll tug at your stitching. If the paper doesn’t want to tear away, use your needle to perforate or score the paper. You can also use tweezers to remove stubborn bits of paper.
Step 5
Appliqué the Edges
Secure the edges of the felt shells with tiny stitches and two strands of embroidery floss. Bring your needle up through the linen and close to the felt. Go back down through the felt. Use matching embroidery floss and very small stitches so they don’t show too much.
Step 6
Add Extra Embroidery
Embroider the small coral and sea plants. If you use freezer paper for this, the process is the same as with the appliqué. Stitch through the paper and then gently remove it when the embroidery is done. You can also use another transfer method if you prefer.
Step 7
Enjoy Your Finished Embroidery
With your embroidery and appliqué finished, you can display your stitching on a stretched canvas or make it into another project! These shells would be beautiful on pillows for your beach house, stitched on a drawstring bag, or even made into a wall banner. Of course, they would also look great stitched individually on clothing or made into pins or patches.
"If you are allured by the beauty of Seashell embroidery for your project. we're here to help! If you need professional Seashell embroidery reach out to us at www.sassydigitizing.com.
Let's put your vision into stitch reality!