The Complete Guide to Cap and Hat Digitizing

The Complete Guide to Cap and Hat Digitizing
Cap and hat digitizing are special types of embroidering techniques in which the given logos, texts, or custom-made designs are digitally converted to stitch onto caps and hats with the help of machines. This requires accuracy and skill as hats come in different types of curved surfaces and materials. A business entrepreneur or an embroidering professional or even a hobbyist will be at his best to improve work quality and impress the clients by mastering this skill.
What is Cap and Hat Digitizing?
Cap digitizing is the process of converting designs into stitch files that are best suited for embroidery on hats. Hats are not like other garments, which are flat; they have a curved and structured surface, and digitizing has to be done with special attention. Proper digitization ensures:
– Clean and precise stitching.
– Designs stay in shape and aligned.
– The embroidery machine works well.
Key Differences Between Cap and Flat Embroidery

1. Design Placement: Many times, there are designs that go on the front panel of the cap which are curved.
2. Material Consideration: Hats can be made of thicker materials, such as twill or canvas, which require appropriate needle settings.
3. Hooping Technique: This involves the use of hoops or frames that are specially designed for keeping the curved surface straight.
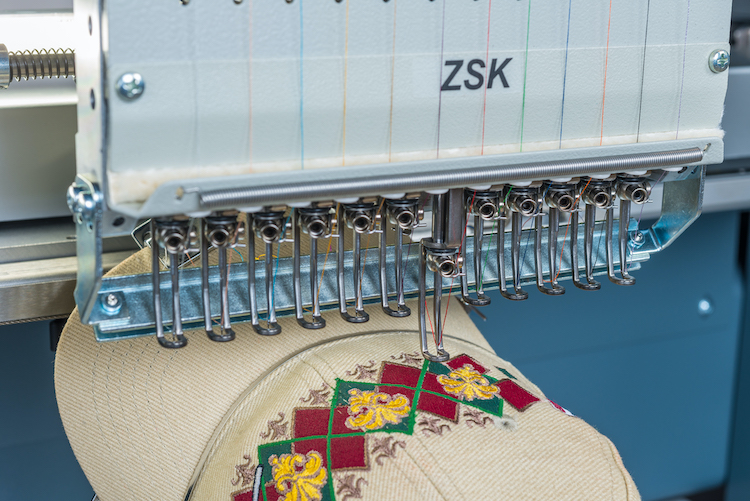
Embroidery machine working on a cap

Caps and Hats Digitizing Steps
1. Understand the Cap Structure
- Before beginning, observe the structure of the hat closely. Consider the following:
– Size of front panel.
– Seams that could interfere with design placement.
– Curvature and how that can distort designs.
2. Choose Suitable Software
- Professional software for embroidery digitizing:
– Wilcom
– Pulse from Tajima
– Embird
These tools let you:
– Set cap-specific templates.
-Simulate embroidery for visualization of the outcome.
- 3. Adjust Design Elements
- Keep the following tips in mind:
-Simplify overly intricate details without distorting them.
– Use bold, thick lines for better visibility.
– Do not make the stitch density too high to avoid puckering.
4. Setting the Stitch Direction Properly
The stitch direction should be according to the curvature of the hat. Common stitches include:
– Satin Stitches: Work perfectly for text and outlines.
– Fill Stitches: For larger areas.5. Consider Design Placement
- Place the design above the seam for maximum visibility. Ensure:
– The design does not extend to the curved edges.
– It has room to fit the embroidery hoop in.
6. Test and Fine-Tune
- Do a test stitch on a sample hat before finalizing the design. This helps identify issues such as thread breaks or misalignments.
Common Challenges in Cap Digitizing

1. Seam Interference: Seams may interfere with the design. To avoid overlap, set the stitches to be offset slightly.
2. Distorted Text: Small fonts may not be readable. Use a minimum font size of 0.25 inches.
3. Thread Breakage: Use good quality threads and proper tension.
Tools You’ll Need
– Embroidery Machine: You have to select one with cap frames. You may consider Brother PR series or Tajima models.
– Digitizing software: Software that supports simulation for a curved surface.
– Stabilizers: Tear-away or cut-away may be used for added support.
Tips for Perfect Cap Digitizing
– Start from the Center: Start stitching from the middle for better alignment.
– Use Cap-Specific Hoops: These hoops keep the hat stable in structure.
– Slow Down: Reduce machine speed for better precision.
Conclusion
Cap and hat digitizing is an art and a science. Learning subtlety in cap structures, having the right tools for the job, and much practice are what make professional-grade embroidery results possible. Whether it be personalization for businesses or making personalized gifts, mastering digitizing skills would give you an extra edge. Start experimenting today and turn your design ideas into awesome caps and hats!
"If you are allured by the beauty of Cap and Hat Digitizing for your project. we're here to help! If you need professional. Cap and Hat Digitizing reach out to us at www.sassydigitizing.com. Let's put your vision into stitch reality!


