“Mastering Kasuti Embroidery: A Step-by-Step Guide”
How to Do Kasuti Embroidery
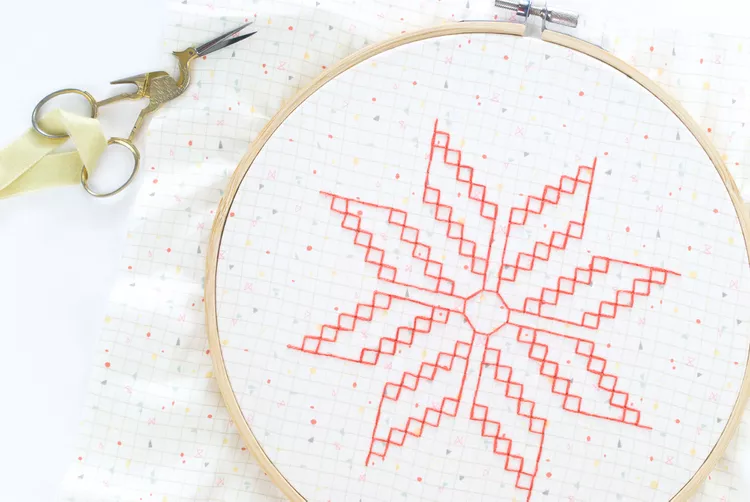
Kasuti embroidery is a type of hand embroidery that originates from Karnatak in India. The beautiful motifs use only a few simple stitches, but the results are stunning, creating detailed borders and intricate designs. Experienced stitchers will likely recognize that Kasuti embroidery is a counted-thread technique that is closely related to blackwork. It’s also similar to some Russian embroidery. But the method for Kasuti makes it unique—and reversible!
This form of embroidery is designed to look the same on the front and back of the work, which means that you should not use any knots to start or end your stitching. However, if you aren’t making a reversible piece, do what makes you comfortable as you are learning.
Four types of stitches are used in Kasuti:
Gavanti stitch: Worked like double running or holbein stitch
Murgi stitch: Worked like gavanti stitch, but creating a zig-zag
Negi stitch: Worked like a darning stitch, in long and short patterns
Menthi stitch: Worked like a standard cross stitch

Kasuti Embroidery Patterns
There are so many traditional kasuti embroidery patterns, although there are a number of common themes or motifs. Lotus flowers (center) are widely used, as are other flowers, animals, shells and plenty of borders. Many are inspired by temples in the Karnatak region.
Like blackwork or other counted thread techniques, kasuti embroidery designs are worked on a grid. Although the patterns shown above are not pictured on a grid, they still are more like a chart and will work on aida or other evenweave fabric.
Download the kasuti pattern JPG and print it out for reference or to transfer the designs. Use the motifs individually or repeat the elements.
Using the Patterns on Different Fabrics
If you are using Aida cloth, each straight line on the pattern represents one square. If you are using an evenweave fabric, decide how many threads to count for each straight stitch. You can easily adjust the size of the pattern by changing the number of threads you count for each stitch.
If you want to use regular linen or quilting cotton, you can either use waste canvas to create the grid on the fabric or treat this as any other embroidery pattern and mark the design directly on the fabric and stitch over it. Use the motifs individually or repeat the elements.
What You’ll Need
Equipment / Tools
Embroidery hoop
Embroidery needle
Materials
Fabric (Aida or even weave)
Embroidery thread

Instructions
Step 1
Starting the Stitch
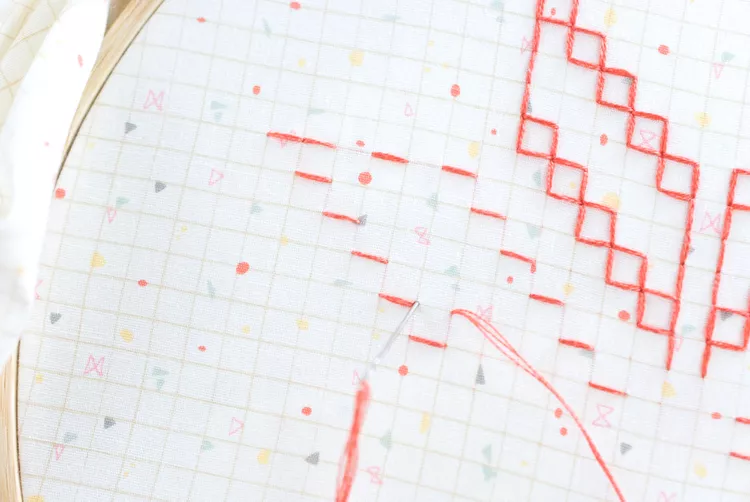
Kasuti patterns that use gavanti and murgi stitches typically look like they are worked with backstitch, but that wouldn’t produce the same look on the front and back.
To create the designs with the double-running stitch style, the lines are made with multiple passes. On a single pass of stitching, every stitch usually goes the same direction.
In the sample below, the stitching starts at the center and forms a diagonal line of horizontal stitches (murgi). On the back of the embroidery, the stitches are all vertical. Following the diagonal line is a row of standard running stitch ,which will eventually be filled in with more running stitch (gavanti).
Step 2
Traveling the Stitching Line
After working one row of stitches (horizontal in this case), return and stitch the other direction. When forming the lines of boxes with murgi stitch, it’s simplest to make a second line of horizontal stitches. This is the second pass along the stitching line.

Step 3
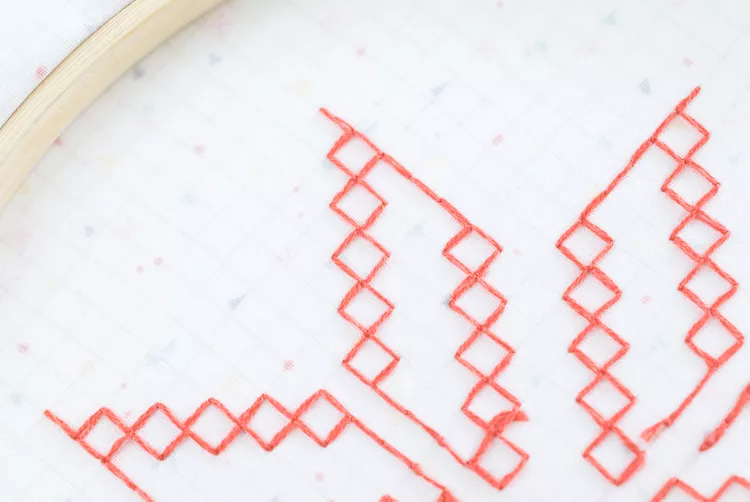
Complete the Vertical Murgi Stitches
Complete the line of embroidery with two more passes of stitching, this time with vertical murgi stitches.
The path of stitching should eventually lead you back to where you started, even if you are going back and forth a few times in the meantime. Following the design to get you back where you started can be tricky at times, but with practice, you’ll find the way.
Remembering that the back of the design should look like the front is often helpful when looking for the best path to take. And when necessary, you can go back over a stitch a second time so that it follows the stitching correctly.
"If you are allured by the beauty of Kasuti Embroidery for your project. we're here to help! If you need professional Kasuti Embroidery reach out to us at www.sassydigitizing.com. Let's put your vision into stitch reality!