


Gaps in embroidery fill stitches make a design look patchy, unfinished, and unprofessional even when everything else is correct. This is not a machine problem. Thread is not the cause either. Every case of fill stitch gaps traces back to three specific digitizing settings: row spacing, underlay, and stitch angle. This guide explains all three causes and gives you the exact fixes to apply.
Why Gaps Appear in Fill Stitches
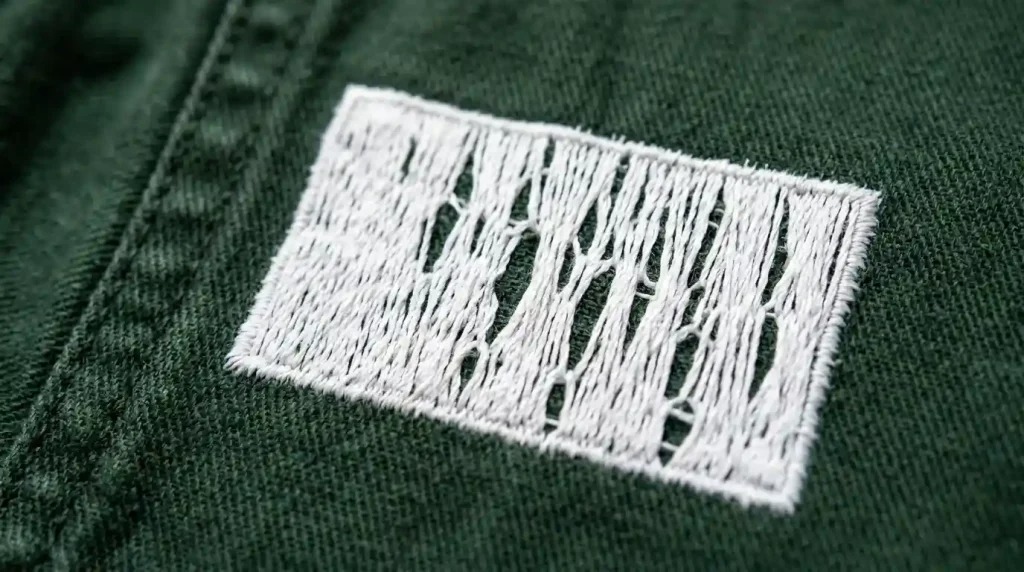
Fill stitches cover a surface by laying rows of short stitches side by side. When those rows sit too far apart, the fabric between them stays exposed. The result is exactly what you see stripes of fabric showing through the embroidery from multiple angles.
Three settings control whether fill stitch rows sit close enough together for full coverage:
Row Spacing Too Wide: Row spacing controls the physical distance between each fill stitch row. Standard woven fabric needs row spacing between 0.4mm and 0.45mm. Above 0.5mm, gaps begin to appear. Above 0.6mm, fabric show-through becomes obvious even from normal viewing distance.
Missing or Incorrect Underlay: Underlay stitches create a raised base for fill stitches to sit on. Without underlay, fill stitches sink into the fabric weave instead of sitting on the surface. Sunken stitches spread apart and create gaps that were not visible in the software preview.
Wrong Stitch Angle for the Fabric Grain: When fill stitch rows run parallel to the fabric grain direction, stitches sink into the grain channels instead of crossing them. Rotating the fill angle slightly even 5 to 10 degrees off the grain forces stitches to cross the fabric grain and sit on the surface rather than dropping into it.
Step 1: Check and Correct Your Row Spacing
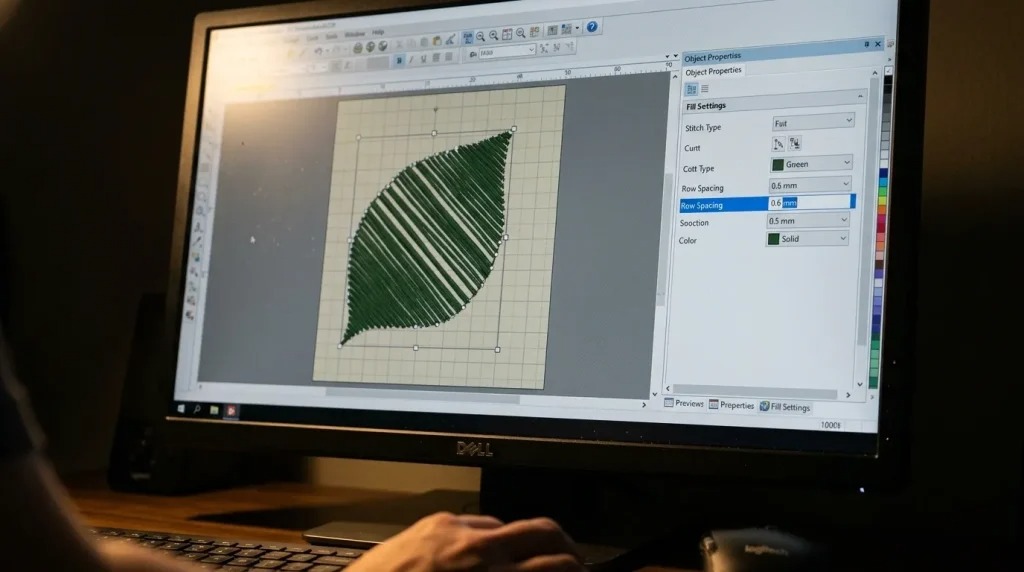
Open your design in your embroidery digitizing software and select the fill stitch object showing gaps.
In the object properties panel, find the Row Spacing or Density setting. Then compare your current value to these correct ranges by fabric type:
- Woven twill, canvas, or jacket fabric: 0.4mm to 0.45mm
- Soft knit or t-shirt fabric: 0.35mm to 0.4mm
- Thick fleece or terry cloth: 0.45mm to 0.5mm
- Structured cap fabric: 0.4mm to 0.45mm
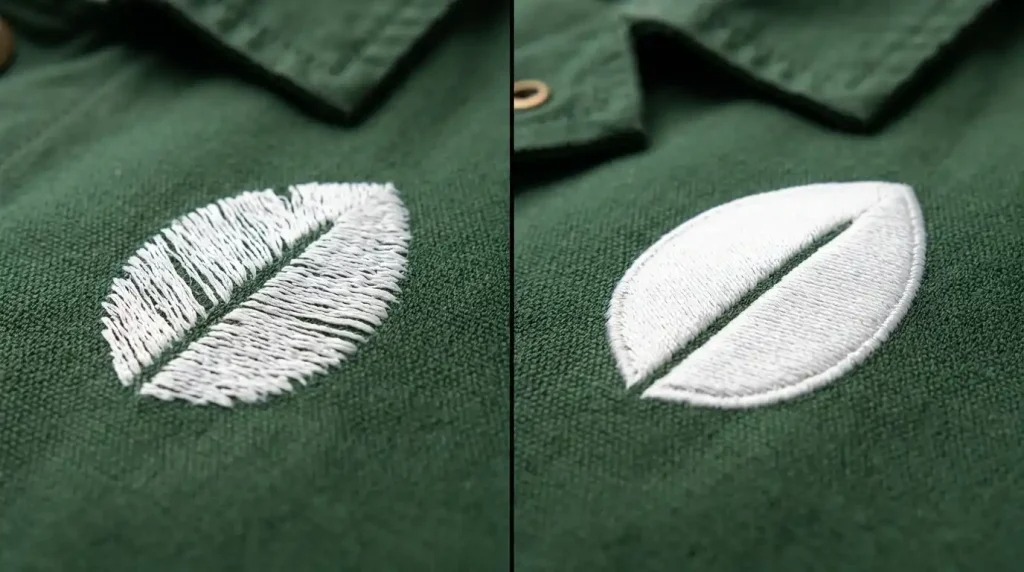
Reduce your row spacing to the correct value for your fabric. After adjusting, your stitch count will increase this is expected and correct. A higher stitch count at proper density means full coverage. The gaps disappear because the rows now sit close enough together to cover the fabric completely.
However, do not reduce row spacing below 0.35mm on most fabrics. Spacing that is too tight creates excessive density. The stitches pile on top of each other, the design becomes stiff and raised, and thread breaks increase on the machine. Over-density is the opposite of gaps but it is equally damaging.
Step 2: Add the Correct Underlay
After correcting row spacing, check your underlay settings. Select the fill stitch object and open the underlay panel in your cap digitizing or garment digitizing software.
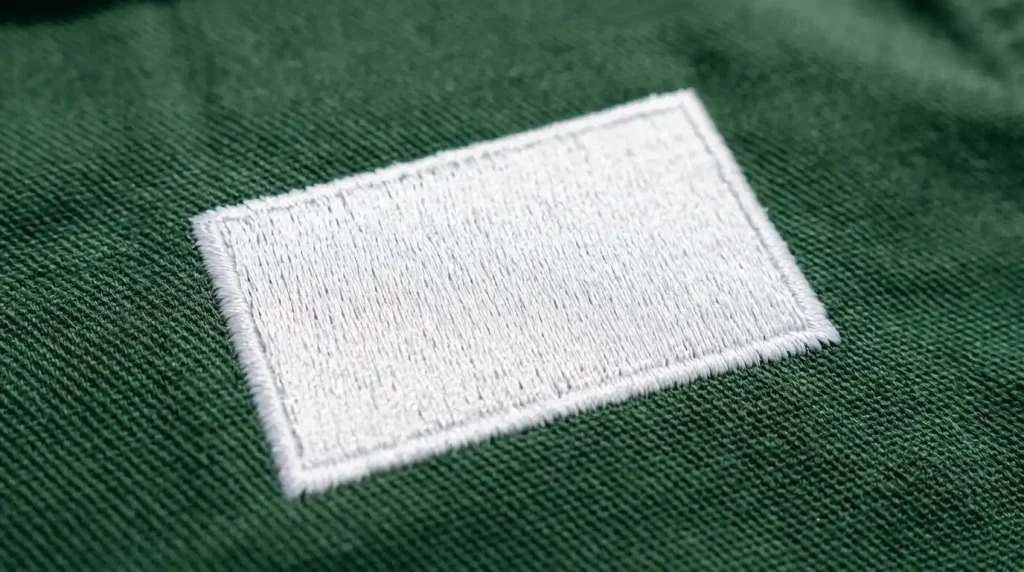
For fill stitch on most woven fabrics, a double zigzag underlay or center run underlay provides the best base. These underlay types create a raised grid that fill stitches lock onto. As a result, stitches stay on the fabric surface rather than sinking into the weave.
Correct underlay settings for fill stitch coverage:
- Underlay type: Double zigzag or center run
- Underlay stitch length: 3mm to 4mm
- Underlay row spacing: 2mm to 3mm wider than the top fill spacing to avoid adding unnecessary density underneath
On thick or textured fabrics like fleece or jacket material, increase underlay density slightly use 1.5mm to 2mm row spacing in the underlay to ensure it fully compresses the surface texture before the fill stitches land on top. This is the same principle used when applying a knockdown stitch for knit caps the underlay flattens the surface so top stitches have a stable base.
Pro Tip: After adding underlay, always run a test stitch before full production. The underlay adds stitch count but should not add visible bulk. If the design looks raised or stiff after adding underlay, reduce underlay density slightly until the result is flat and clean.
Step 3: Check the Fill Stitch Angle
The third fix is the easiest and most overlooked. If gaps persist after correcting row spacing and underlay, check the fill stitch angle relative to the fabric grain direction.
Most woven fabrics have a visible grain running either horizontally or vertically. When fill stitches run at 0 degrees or 90 degrees perfectly aligned with the grain the stitch rows drop into the grain channels and create gaps.
Therefore, rotate the fill angle to 45 degrees as your default starting point. A diagonal angle crosses the fabric grain on both axes simultaneously. Consequently, every stitch sits on top of the grain intersections rather than dropping between them. This small change consistently eliminates residual gaps that remain even after row spacing has been correctly set.
For designs where the fill angle needs to match a specific visual direction, compromise at 10 to 15 degrees off the grain rather than perfectly aligned to it. Even a small offset prevents grain channel sinking without visually changing the design’s appearance.
Correct stitch angle is also one of the key settings that prevents fill stitches from leaking outside the outline the same 45-degree rule applies to both containment and coverage quality.
DIY Fix vs. Professional Digitizing

Fixing fill stitch gaps requires professional digitizing software where row spacing, underlay type, and stitch angle can all be adjusted independently for each fill object. Basic machine software and auto-digitizing tools apply generic density values. These generic values work adequately on simple designs but fail on thick fabrics, large fill areas, and multi-element logos.
If your design consistently shows gaps across multiple garment types despite machine adjustments, the digitizing file itself needs to be corrected not the machine settings. At Sassy Digitizing, our team reviews and corrects density, underlay, and stitch angle manually for every fill element in every file. Our embroidery digitizing service ensures your file produces clean full coverage on the first production run. Check our pricing to get started.
Summary
Fixing gaps in embroidery fill stitches requires three corrections applied in order:
- Fix 1: Reduce row spacing to 0.4mm to 0.45mm for woven fabrics — tighter rows eliminate gaps between fill stitch coverage
- Fix 2: Add double zigzag or center run underlay at 3mm to 4mm stitch length to raise fill stitches off the fabric surface
- Fix 3: Rotate fill stitch angle to 45 degrees to prevent stitches from sinking into the fabric grain channels
All three fixes are applied inside professional digitizing software. For files corrected and production-ready from the first run, Sassy Digitizing handles every setting manually for clean consistent results.
FAQs
1. Why does fabric show through my embroidery fill stitches? Row spacing is set too wide, underlay is missing or incorrect, or the fill stitch angle aligns with the fabric grain. All three causes allow stitches to sit too far apart or sink into the fabric, leaving gaps that expose the fabric underneath.
2. Will increasing machine speed fix fill stitch gaps? No. Fill stitch gaps are a digitizing problem the row spacing, underlay, and stitch angle are set in the digitizing file. Machine speed has no effect on stitch coverage density.
3. Can I fix fill stitch gaps without professional digitizing software? Not reliably. Row spacing and underlay controls are only available in professional digitizing software. Machine loading software does not allow individual fill object density adjustments.
Keith Blair
Senior Quality Control (HOD)
As the Head of Quality Control at Sassy Digitizing, Keith brings over 12 years of hands-on commercial embroidery experience to the table. He is our resident problem-solver, specializing in the technical nuances of stitch density, pull compensation, and complex digitizing. When he's not establishing quality standards for 3D puff and appliqué, you'll find him perfecting the art of small lettering to ensure every stitch counts.
Expertise:
Related Articles
How to Convert PNG to PES for Embroidery: The Complete Guide (2026 Update)
When converting a PNG image to a PES file, you are essentially translating a flat picture into a language your machine u…
The Ultimate Guide to Embroidery Machine File Formats
One of the most confusing parts of embroidery is understanding file types. You might have a beautiful logo in a JPG or A…

Top 10 Best Embroidery Digitizing Companies in the World
In 2026, the embroidery industry has reached a level where precision is no longer optional—it’s a requirement. Whe…