


If your embroidery is puckering, shifting, or looks uneven after sewing, your design needs an underlayment. Underlayment is the hidden foundation stitched beneath every embroidery design and skipping it or setting it incorrectly is one of the most common embroidery digitizing mistakes made by beginners and even experienced digitizers.
This guide explains what underlayment is, why every design needs it, and how to apply it correctly for clean, professional results.
What Is Underlayment in Embroidery?
Underlayment also called underlay is a layer of stitches placed on the fabric before the main design is sewn. It is invisible in the finished product but completely responsible for how stable, flat, and clean the top stitches look.
Think of it like a foundation before building a wall. Without it, everything above shifts, sinks, or distorts. With it, every top stitch has a solid base to lock onto.
Why Your Design Needs an Underlayment
Skipping underlayment causes three specific problems that ruin the final result.
The fabric shifts during stitching. Without underlay locking the fabric in place, the embroidery machine pushes the fabric forward with every stitch. The design ends up distorted and off-center by the time it finishes sewing.
The stitches sink into the fabric. On fabrics like fleece, terry cloth, or knits, the top stitches disappear into the pile without an underlay layer to push them up and hold them above the surface.
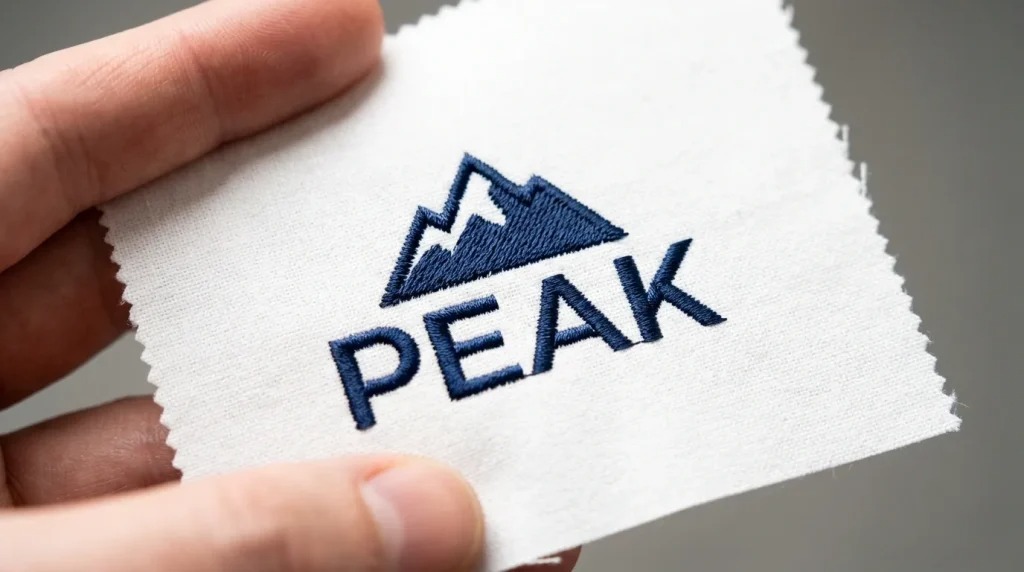
The design puckers and pulls. Satin stitches and dense fills create tension on the fabric. Underlay distributes that tension evenly so the fabric stays flat instead of gathering and puckering around the design edges.
Types of Underlayment and When to Use Each
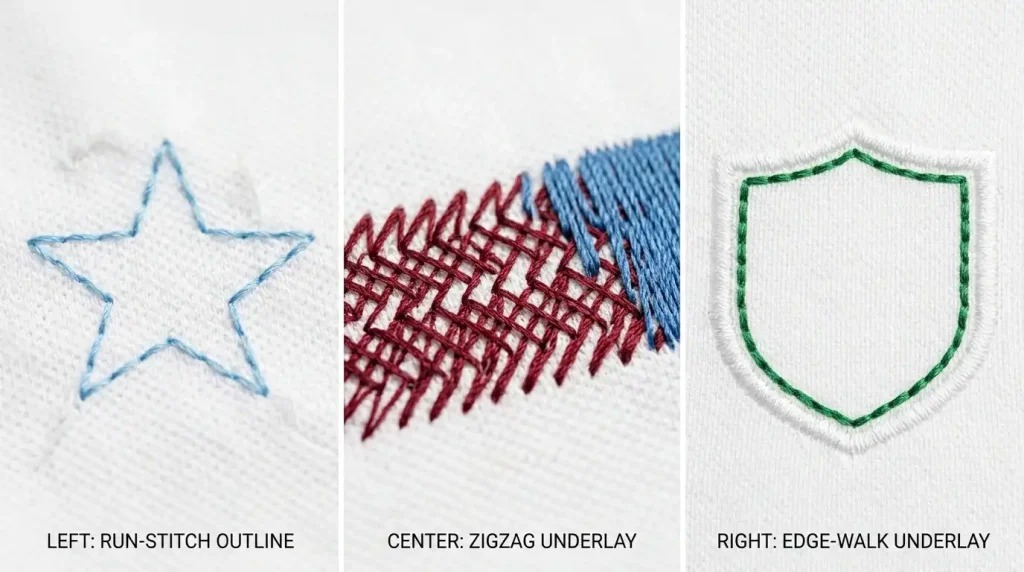
Run Stitch Underlay
The simplest underlay a single line of run stitches that outlines the shape. Best for small designs, thin lettering, and simple logos on stable woven fabrics. It uses the lowest stitch count and adds minimal bulk.
Pro Tip: For left-chest logos under 3 inches on woven fabric, a run stitch underlay is almost always enough.
Zigzag Underlay
A zigzag pattern stitched across the fill area before the top stitches begin. Best for medium to large fill areas on stable fabrics. It creates a crosshatch base that locks the fabric and gives top stitches something solid to grip onto.
Edge Walk Underlay
Stitched just inside the border of a shape not across the full area. Best used in combination with zigzag underlay on large designs or as the only underlay for thin satin stitch columns. It reinforces the edges and keeps the border crisp and defined.
Step-by-Step: How to Apply Underlayment Correctly
Step 1: Identify the Fabric Type
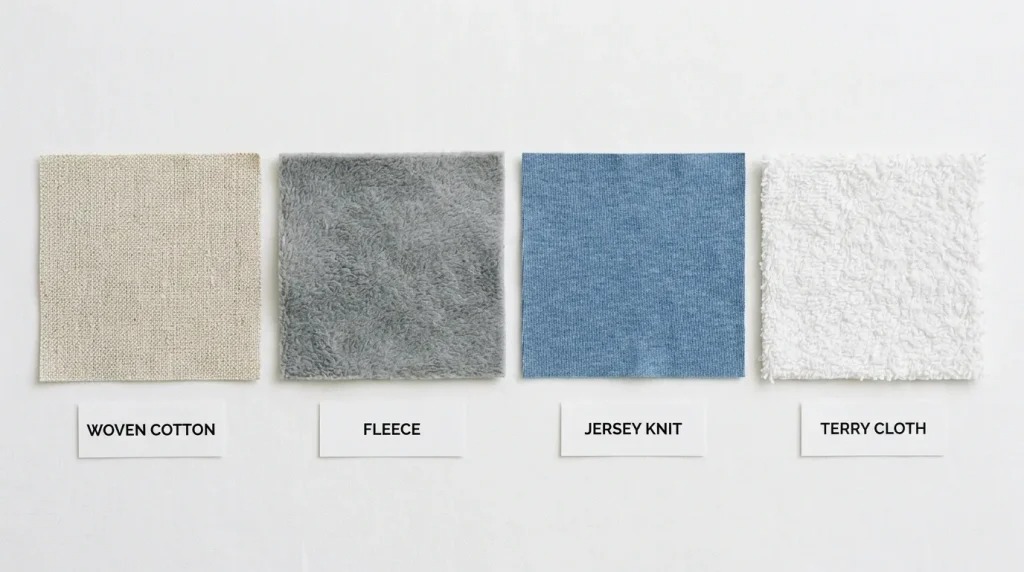
The fabric determines everything about your underlay choice. Stable woven fabrics like cotton twill need minimal underlay. Unstable stretchy fabrics like jersey and fleece need heavier underlay to prevent shifting and sinking. Always identify the fabric first before selecting underlay type.
Step 2: Choose the Right Underlay Type for the Design
Match the underlay to the design and fabric combination:
- Small logo on woven fabric → Run stitch underlay
- Large fill area on woven fabric → Zigzag underlay
- Any design on fleece or knit → Edge walk plus zigzag combined
- Thin satin columns or lettering → Edge walk underlay only
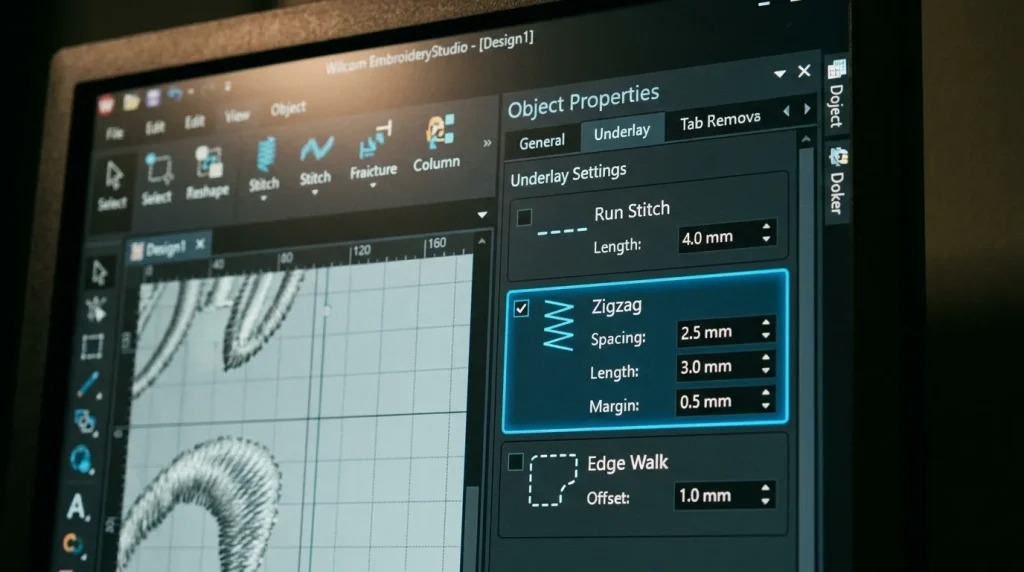
Step 3: Set the Correct Underlay Density
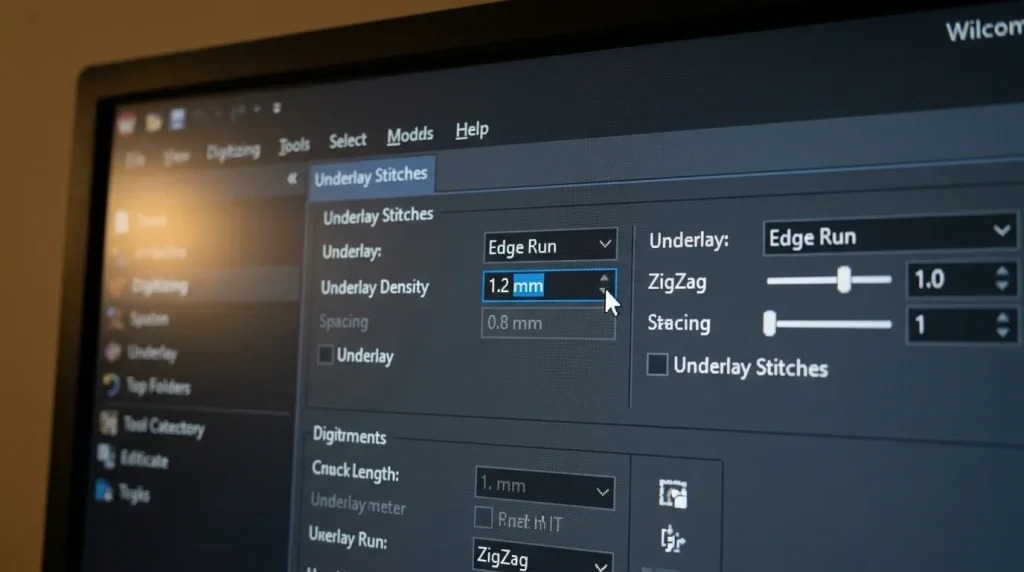
Underlay stitches should never be as dense as the top stitches. A standard underlay spacing of 2.0mm to 3.0mm is correct for most designs. Too tight and the underlay itself becomes the bulk problem. Too loose and it fails to stabilize the fabric properly.
Step 4: Test With a Sew-Out
Always run a test sew-out on the same fabric before committing to a full production run. A sew-out reveals whether the underlay is holding the fabric correctly, whether the top stitches are lying flat, and whether any adjustments are needed before you waste garments in production.
According to Wilcom’s embroidery production guidelines, testing underlay settings on actual fabric is the most reliable way to verify digitizing accuracy before production begins.
DIY Underlayment vs. Professional Digitizing
Getting underlayment right requires experience with different fabric types, design sizes, and stitch behaviors. A wrong underlay choice on a bulk order means wasted garments and lost time.
At Sassy Digitizing, every file is manually digitized using Wilcom software with the correct underlay type selected for your specific fabric and design. Our digitizing services start from just $15 and every file is tested before delivery. Check our pricing and get your design digitized correctly the first time.
Summary
Your design needs an underlayment every single time, no exceptions. The right underlay type, applied at the correct density, is what separates flat professional embroidery from puckered, shifting, amateur results. Identify your fabric, choose the matching underlay type, set the correct density, and always test before production.
Need it done correctly from the start? Contact Sassy Digitizing today.
Keith Blair
Senior Quality Control (HOD)
As the Head of Quality Control at Sassy Digitizing, Keith brings over 12 years of hands-on commercial embroidery experience to the table. He is our resident problem-solver, specializing in the technical nuances of stitch density, pull compensation, and complex digitizing. When he's not establishing quality standards for 3D puff and appliqué, you'll find him perfecting the art of small lettering to ensure every stitch counts.
Expertise:
Related Articles
How to Convert PNG to PES for Embroidery: The Complete Guide (2026 Update)
When converting a PNG image to a PES file, you are essentially translating a flat picture into a language your machine u…
The Ultimate Guide to Embroidery Machine File Formats
One of the most confusing parts of embroidery is understanding file types. You might have a beautiful logo in a JPG or A…

Top 10 Best Embroidery Digitizing Companies in the World
In 2026, the embroidery industry has reached a level where precision is no longer optional—it’s a requirement. Whe…